
Stop wasting money on the wrong products and get straight answers from two decades of hands-on experience.
The world of car care is filled with an ever-growing list of products promising the ultimate shine and protection. If you’ve spent any time exploring your options, you’ve likely come across terms like:

This massive variety of ceramic coatings and waxes can make it difficult to know where to start.
To be clear, there’s a world of difference between a simple spray-on “ceramic” topper and a true, bottled ceramic coating. We’re here to break down the latter.
Whether you’re a weekend warrior looking to level up your shine or a car enthusiast trying to decide if a DIY coating is right for you, this article is for you. This guide has everything you need to get started.
Like any other form of paint protection, ceramic coatings come in a wide range of forms and philosophies. At its core, a true 1-year ceramic coating is a liquid polymer, usually with a Silicon Dioxide (SiO₂) base, that you apply by hand. It comes in a small ceramic coating bottle and chemically bonds with your vehicle’s factory paint, creating a semi-permanent, sacrificial layer of protection on all your painted surfaces.
Unlike traditional waxes that just sit on top of the paint, a ceramic coating becomes the new functional surface of your vehicle’s paintwork through a strong chemical bond.
Think of it this way: Wax is like a good raincoat. It protects you, but it wears off and needs frequent reapplication. A professionally installed, multi-year coating is like a permanent Gore-Tex shell bonded to your skin. A 1-year DIY ceramic coating is the perfect middle ground—a high-performance, all-season jacket that is far more durable than the raincoat.
More Gear: Leather Cleaners | Portable Upholstery Cleaners | Screen Cleaners

Best Overall Interior Cleaner
Credit: Andi Hedrick
Works on all surfaces, including glass and screens
Shields components from harmful UV rays
Strong scent
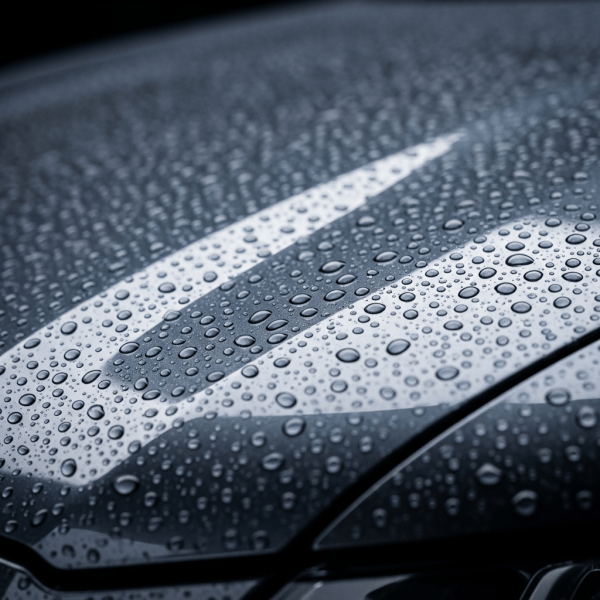
So, why go through the trouble? While marketing claims can be exaggerated, a quality coating will deliver on these three core benefits:
A ceramic coating’s performance and durability depend almost entirely on the preparation. Applying a coating to contaminated or swirled paint is like putting a glass screen protector on a dusty phone screen—you’re just locking in the imperfections.
Let’s explore each essential phase.
Decontamination is a deep-cleaning process that removes contaminants a normal wash leaves behind. This ensures the surface is perfectly clean for the next step. It’s a full spa treatment for your paint.
What does decontamination involve?
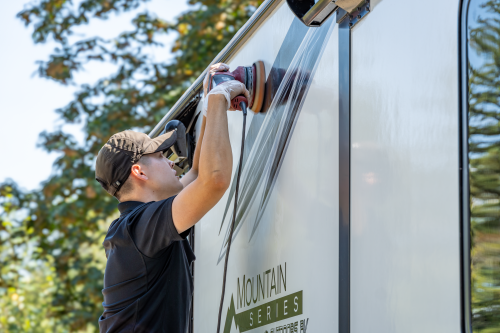
Paint correction is the process of machine polishing the paint to remove imperfections like swirl marks and fine scratches. This is the most critical phase for visual results. A coating will enhance whatever surface it’s applied to, so polishing the paint first ensures you are locking in a near-perfect finish.
This is the final cleaning step before application. You must remove any polishing oils or residues left over from the paint correction phase so the coating can form a direct chemical bond. If oils are present, the coating will fail to bond properly and its durability will be drastically reduced. This is typically done with an Isopropyl Alcohol (IPA) solution or a dedicated panel prep spray.
You’ve made it! This is where you finally get to use that little ceramic coating bottle. The process is methodical but incredibly rewarding.
What does the application involve?
Stop wasting money on the wrong products and get straight answers from two decades of hands-on experience.


